Do you want to know how to fix the Java Mail Authentication Failed Exception in spring boot Application development? Here follow the steps shown below to get a 100 percent fix.
Contents
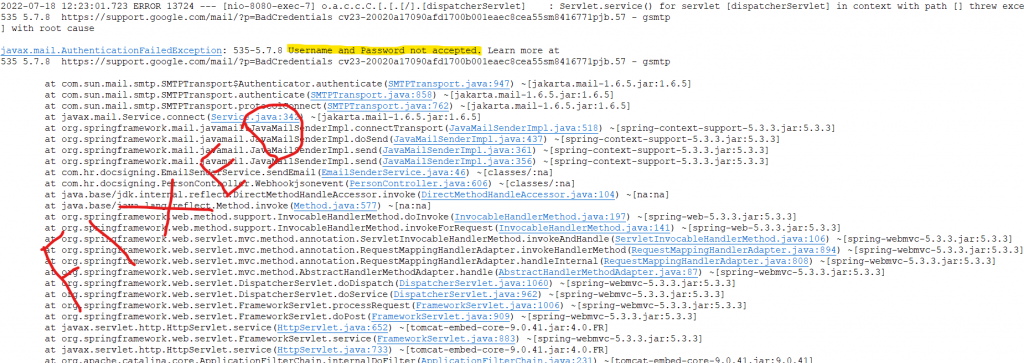
Error javax.mail.AuthenticationFailedException
The full form of exception is like getting “javax.mail.AuthenticationFailedException: 535-5.7.8 Username and Password not accepted”. The exact image of the issue is shown bellow.
ISSUE EXPLANATION:
In the spring boot application, we define the application.properties by the SMTP properties like below.
spring.mail.host=smtp.gmail.com
spring.mail.port=587
spring.mail.username=*********@gmail.com // your smtp gmail usernamespring.mail.password=******* //
usually gives your smtp gmail login password( which is Wrong)
spring.mail.properties.mail.smtp.auth=true
spring.mail.properties.mail.smtp.connectiontimeout=5000
spring.mail.properties.mail.smtp.timeout=5000
spring.mail.properties.mail.smtp.writetimeout=5000spring.mail.properties.mail.smtp.starttls.enable=true
application.properties
spring.mail.properties.mail.smtp.ssl.trust=smtp.gmail.com
As I mentioned above the password which you provided in application.properties is wrong. You should not give a login password of Gmail.
Previously google allows permission to turn on/ off Less secure apps. So if you are ON the Less secure apps permission for the particular Gmail id. The Gmail login password can be used here for application.properties.
But now in the present Gmail team make this Less secure apps option default off for more security protection.
Solution:
Gmail allows you to generate an app password from Gmail 2-step verification and use that password in the application.properties
Steps to fix Java Mail Authentication Failed Exception:
Step 1: Log in to your Gmail account.
Step 2: Go to “Manage your Google Account” in the top right-most corner of your Gmail.

Step 3: Choose the Security option from the left side.
Step 4: Enable 2-step verification by providing a captcha / or by password/text message verification. It depends on your choice. I choose text message verification.
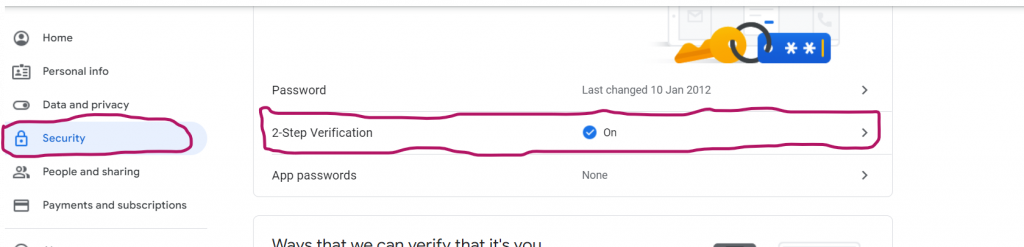
Step 5: Once the 2 step verification is ON. Go to Security –> App password.
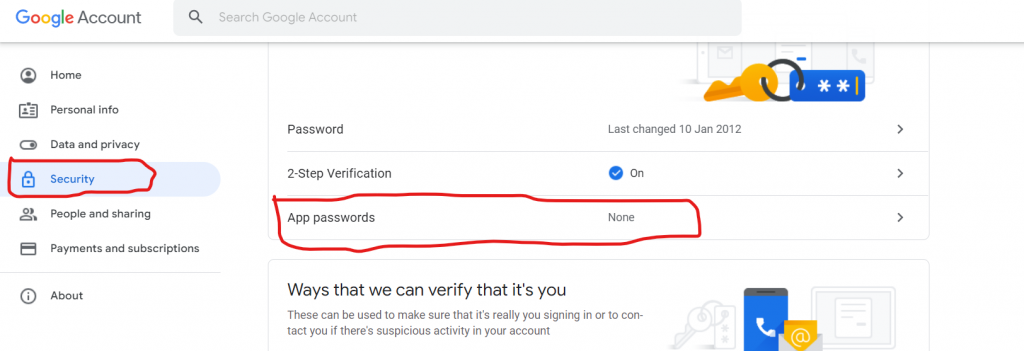
Step 6: It will ask for your password confirmation. After that, it will take it App password generate screen.
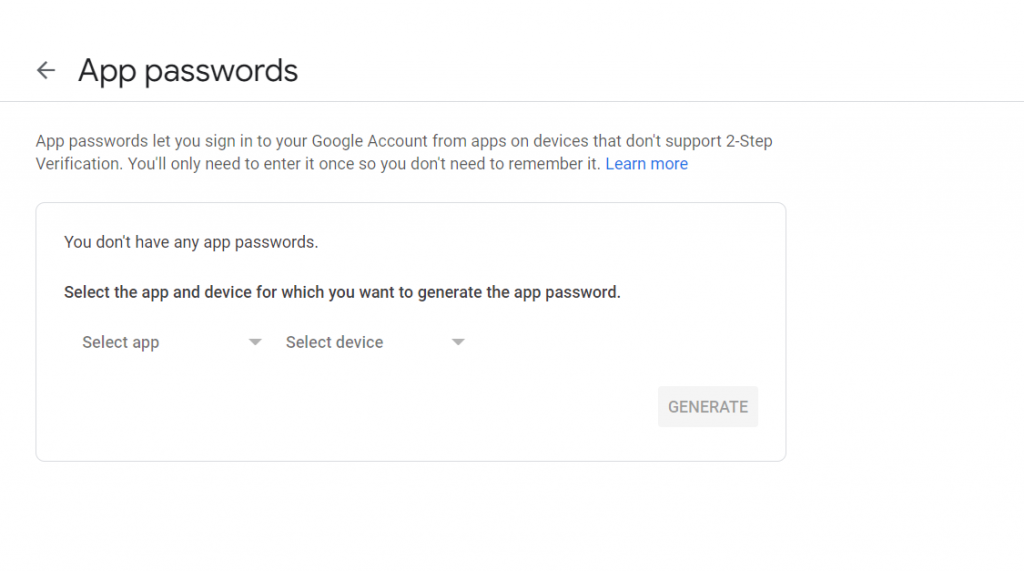
Step 7: It will ask for you to select the app and device. That you want to use the password.

Step 7: Choose the app –>mail and device others
Step 8: Provide a custom name. Here I give the name All Device.
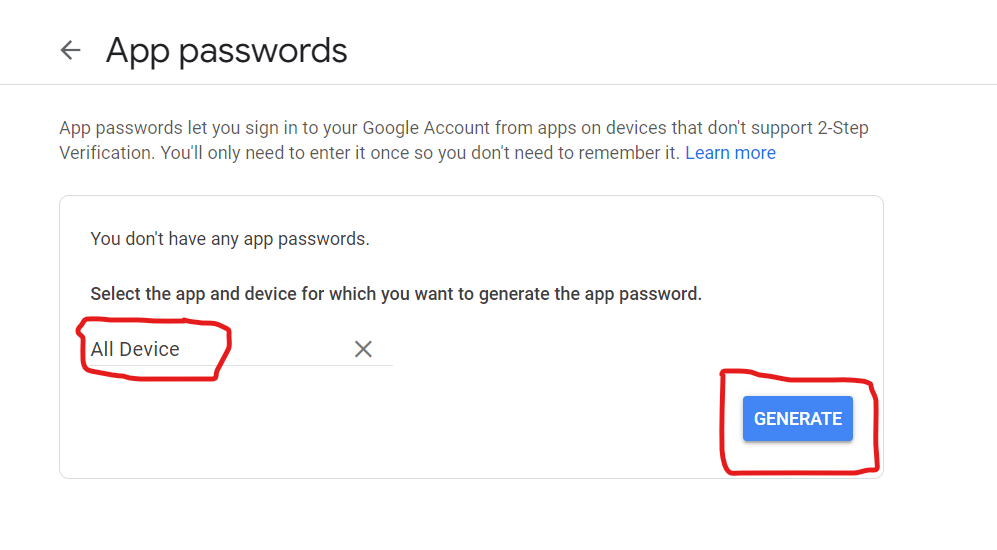
Step 9: Click on Generate button. It will generate 16 digit App password which is unique. And note it some were. It will not accessible again.

Step 10: Click on the Done button.
Step 11: Now add this password to your application.properties
spring.mail.host=smtp.gmail.com
spring.mail.port=587
spring.mail.username=*********@gmail.com // your smtp gmail usernamespring.mail.password=bcujlgnjkhzqnblv ( App password for gmail which is Right)
spring.mail.properties.mail.smtp.auth=true
spring.mail.properties.mail.smtp.connectiontimeout=5000
spring.mail.properties.mail.smtp.timeout=5000
spring.mail.properties.mail.smtp.writetimeout=5000spring.mail.properties.mail.smtp.starttls.enable=true
application.properties ( with right data)
spring.mail.properties.mail.smtp.ssl.trust=smtp.gmail.com
Conclusion Words:
Hurrah !! I made it mail delivered to the recipient. Hurry up go and try your code and leave comments if any other things are needed. You can check this intimation on google’s official page.
Also read Webmail not Loading, Sending& Receiving Solution.
